Showing posts with label Bodywork. Show all posts

Wednesday, 31 October 2012

Part B... 10 final steps of how to remove a wing! And the door!

Well I finally decided to catch up with this blog! Quite a few things have been done now and hopefully over the next week I will get them all published up here. To let you know what you are in for...

-The engine has been removed
-Bonnet and door removal
-Interior trim removal
-Cutting and replacing panels, a crash course
-Wing restoration/ condemning


And of course the wing removal iteself. 


So here we go!

PART II OF HOW TO REMOVE A FORD CAPRI WING - AND THE PASSENGER DOOR!


(continuing from the previous post)

Step 11,

By now you wife and kids should have left you, possibly taking the car with them as equity. If this has happened im afraid the road ahead for you is over. Try www.match.com, get a new family, buy a new Capri, realise the wings on that one too are shot, and repeat step 1. 

Step 12, As the front of the wing is now disconnected, you only have the back to do, but in order to do this, I'm afraid the door is going to have to come off. Its a pretty easy job, more so on the passengers side, the drivers side is a little more difficult and will be explained in a separate blog about dash removal. 

This picture should fill you full of confidence! I can do it! So can you!

Sit in the car with the door as wide open as it will go, unwind the window fully (this helps with lifting the door later) and grab a friend to lend you a hand. 

I will tell you this now THE DOOR IS HEAVY. Not horribly so, but heavier than you think if you have never picked on up before!


Step 13,

Whilst sat in the car locate the mounting bolts and pins. This picture shows the drivers side, because I forgot to take any pictures until after I removed the door. DOH!


 Don't no matter what you do attempt to disassemble the hinges, they don't make the pins any more and you will never get it to sit right! With the door open, you need to remove the plastic trim piece in the footwell.....


 There are no obvious ways of doing this, as there and no screws, the whole thing is a plastic push fit design, however if you lift up the carpet and unscrew the front of the kick plate/ strip, the removal of this is much easier! And yes, my dash is held up with some wood. This was not my doing! :S

As you can see the plastic poppers are located near the door seal, so remove a little of the door seal and the plate pops off and slides out. 


Step 14,

Remove the electrical connections and the waterproof boot. On mine the only connection was the speaker wire, so a pair of wire snips made short work of it! 

Once that plate is removed you should see this.


Sorry about the picture size but it helps to understand it! The bolts can be accessed then, three at the top and three at the bottom. The middle pin can be removed with the cir-clip (have I spelt that right?) at the bottom and then just punching it out with a screwdriver. 

Make sure someone is holding the door as you undo them!


Easy ay? A quick clean up is also a good idea to keep rust at bay, catching it early makes it dead easy, and will save you hours of problems later down the line, its also a good idea to have a quick look under the carpets. My floor is pretty solid (thank god!) but the plugs are not so good, im going to replace them pretty quick. I don't like wet feet!


Step 15,

Again this photo needs rotating, but you get the idea! You can see the spot welds as the wing connects to the A frame, drill these out and then using a hammer and a chisel follow the seam up!


As can be seen here:


 Step 16,

Before you let that wing come off, remove the indicators and the ariel!


Step 17,

Continue to pull/ drill the wing off until the whole thing becomes a bit wobbly! You should be able to start seeing more and more light through the panel gaps!


Step 18,

Head under the car and take the final few spots off, get a friend to grab the wing as slicing you in half will seriously hamper your day. 


 Step 19, 

Don't be afraid to use that old chisel! Pull apart the sandwiches of metal and it becomes much easier to do this as the wing becomes disconnected and less stable!


The body has been filled with seam sealer and other bits of rubbish from the ford factory, and bodge DIY repairs, so if something is stuck, see if a screwdriver will go through it! A hard pull got these two apart!

Step 20,


 Off comes the wing! Its inspection time now, have a good look and see what needs doing, keep rust at bay and give everything a good clean to get the road much off and all the salt. 


Job done!

Go pat yourself on the back and plaster your wounds. We are taking out the engine next!

Sunday, 30 September 2012

Part A of 10 steps to remove a wing....without destroying it!

Well hello blog world! Its been a while...


Earlier this month, I ran out of money. I don't mean, I had only a little left, I meant, a stone cold broke zilch. 

Oh dear.

Anyway! Its now the end of the month and things are starting to happen again! So let me fill you in....

The wings on the Capri, and indeed any Capri, were rusted, but not so badly that they needed to be thrown away, I think they are salvageable. But they still have to come off, and this means doing it without destroying the wing in the process. 

Balls. 

When I have read up on wing replacement, everyone just said to cut off as much metal as possible and slap on a new one! Well that isn't possible here..because I am keeping the wing!

So here we are, the First 10 steps into how to remove a wing.

Step One...

 Sit down and consider buying a new car. Whilst crying. 


Step Two...

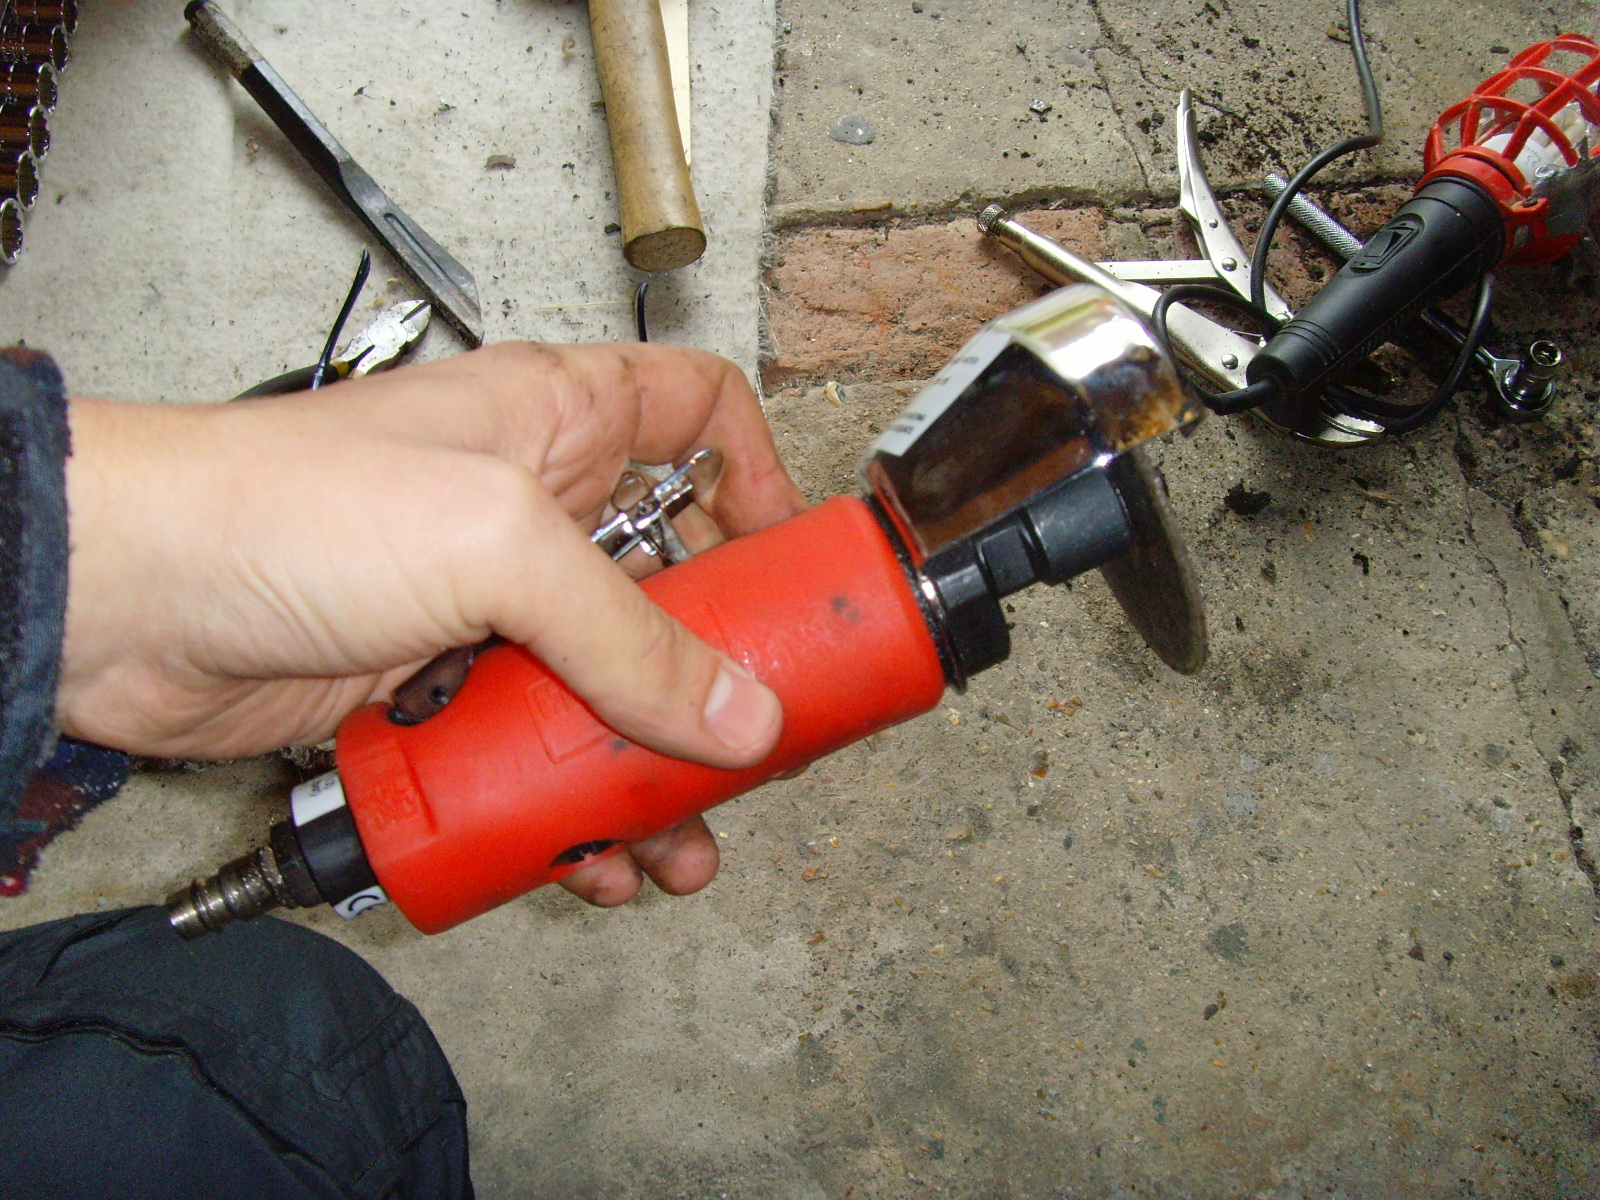
Realise you are actually a lot mainlier than everyone thinks, and compensate by buying £150 worth of new tools. I satisfied this with a new compressor and a cut off tool! 


Look at it! Its red and everything! Nothing says matcho amateur mechanic like your shiny red tool. 
Truth be told, this is actually a very handy devise, its not quite as vicious as a conventional angle grinder, and the right angled blade is very practical! 


Step Three...

Right, put on your strong pants and have a cup of bovil ready, the next step is horrible if you have never butche....err...restored... your Capri before. 


In an ideal world, you would find the spot welds along the drip rail (seam) and drill them out one by one, and use a cold chisel to pry to the two pieces of metal apart. Apon which the wing would pleasantly plop off and we would all go inside the warm house for tea and medals. As is seen in this picture >>> 

My drip rail was made of dust. I don't know what was actually holding on the top part of the wing but it can't of been too far from magic. Cut it off if you have the same problem as me. Its actually quite enjoyable when you get past the initial terror of purposely destroying your own car! 

HOWEVER. If you do do this, cover the windscreen with something suitably tough, as the spray from the angle grinder will happily haze up you windscreen. As I did with mine. Lucky I am having to replace it then ay!


This picture shows how much awesome fun it can be! 


Step 4...

Stand back and admire your shocking handywork. If you have done it correctly, the cut should be cock eyed and wonky. Preferably you should also be bleeding. If not repeat step 3. If your cutting is as sketchy as mine, go over the seam with a metal grinding disk, and take back any edges to flush metal. Giving it a cheeky spray of WD 40 will also stop rust from forming if you are leaving it unpainted for a week or so. Any more a coat of primer wouldn't go amiss.

Step 5...

After cutting the seam off, try to prise the wing away from the inner wing as much as you can, a chisel and a hammer work magic here. As you can see the front part of my inner wing is dust anyway, so this came away with relative ease! Rust for once was a help! But it does mean I have to replace the front section of the wing in due course....


Step 6...

Chase the seam around the headlight bowls, some cutting may be needed here as this is where rust usually holds the wing on rather than any mechanical means! If you are re-using the wing as I am, I suggest you re-weld on a new drip rail to the inner wing, and then weld on outer wing supports. Push the wing so that the panel gap between the bonnet and wing are correct again, and mark on the inner wing with paint of tip ex (if you don't have a white capri!) where the two meet up so that when you put the wing back on, finding the correct fitment position won't be a pain in the arse! This will be included in the next part called "10 MORE STEPS TO REMOVE AND RESTORE A WING!'

If you continue to follow the seam around you will work your way into the headlight bowl surround. As seen again on mine, this is just rust (can anyone else see the re-occouring theme here?) so a quick grind and the thing came off.


Again in an ideal world you would drill out the spot welds and the tab would unpop. If you can see the tab in the above picture you are a better person than me. Because its vanished in a pile or corrosion!


Step 7...

Bring on the fun! After that seam there are only three bolts holding on the front of the wing.

Bah...its only three bolts! How hard could that be!

A days work.

Here are the culprits...

There is one out of view in this picture, but thats the three. The picture needs to be rotated but the button appears to have disappeared. Please tilt your head 90 degrees left. 

After introducing penetrating fluid and heat two of them came off. The third (lowest) was stuck fast, so I just cut right through the tab with my the cut off tool.


It is a tad out of focus, but you get the idea! After which, the front part of the panel should look like this...


If you have done it properly your socket set should look like this:


Oh well serves me right for using cheap tools! I thought I had rounded the head of one bolt, to find the bolt head sharp as a knife, but the socket rounded!

Whaaa?

Step 8...

Swear. A lot. Or beast your children if you have them. You should have no knuckles if you have managed to get the bolts off. Less skin = Job well done. 

Step 9...

Plan. 

If like me you are going to be putting the wing back on after refurbishment, then leave reference marks everywhere so that the panel will fit back on a dream (in theory!) without having to bash it into shape. Take your time when removing the wing, its not a race, and you will find it will come off quicker if you are not in a rush. I am lucky in having two cars, so when I get fed up with the capri I can go inside and still make it to work in the morning! If you do not have this luxury...get back in the garage. 

Step 10...

I don't have a 10th. Apparently I overstepped myself looking for a catchy title. I suppose you could use this step to clean the garage? Or play with the cat? 

In the next instalment I will go over removing the back of the wing. I will post a link to that in this blog when I have written it. 


ISN'T SHE PRETTY! And yes she is running! Hearing it start up from time to time makes you remember the car is still alive, and after all your hard work, you will be able to enjoy her blasting down some B roads.

Until you break down ;)

F *****s
O nly 
R oll
D ownhill


PART B NOW OUT! Finish off that wing guys!

WING REMOVAL PART II

Tuesday, 4 September 2012

Restoration

The Capri is now sat in the garage with many bits taken off it and the long and arduous task of rust and metal removal has started! However, firstly, here is load of photos of the car and how it got to its current state.


The camping trip had a bit of a nasty effect on the Capri, and on the way home I was stuck in some traffic, watching the temperature needle creep slowly up, a bird released all mother of its bowels onto the windscreen. On turning on the windscreen washers I managed to get the majority of what should remain inside a bird off the windscreen before hearing a muffled "Sploof" from under the bonnet.

Nothing serious! But the 25 year old rubber water hose had popped off the junction to the sprayers, simply solved with a cable tie round each end of the hose to make sure it doesn't happen again!

The temperature problem is a simple fix that will be sorted with the engine overhaul. The radiator is new, and all the hoses, pumps and thermostats work as they should, on the move it is fine! But the viscous fan has had it, I will either replace the coupling or more than likely replace it with an electric fan in front of the radiator which will provide piece of mind in traffic jams and also free up a little space in front of the engine. 


 Finally the last problem I had on the trip was the weather, which was glorious! So the windows and sunroof were open as wide as they could go! Unfortunately the rust on the sunroof wouldn't let the thing close....with force it did! But made a nice cut line down to bare metal...great! So a quick spray of white undercoat to keep rust away was sprayed on and a mental note to not open it fully until mended!

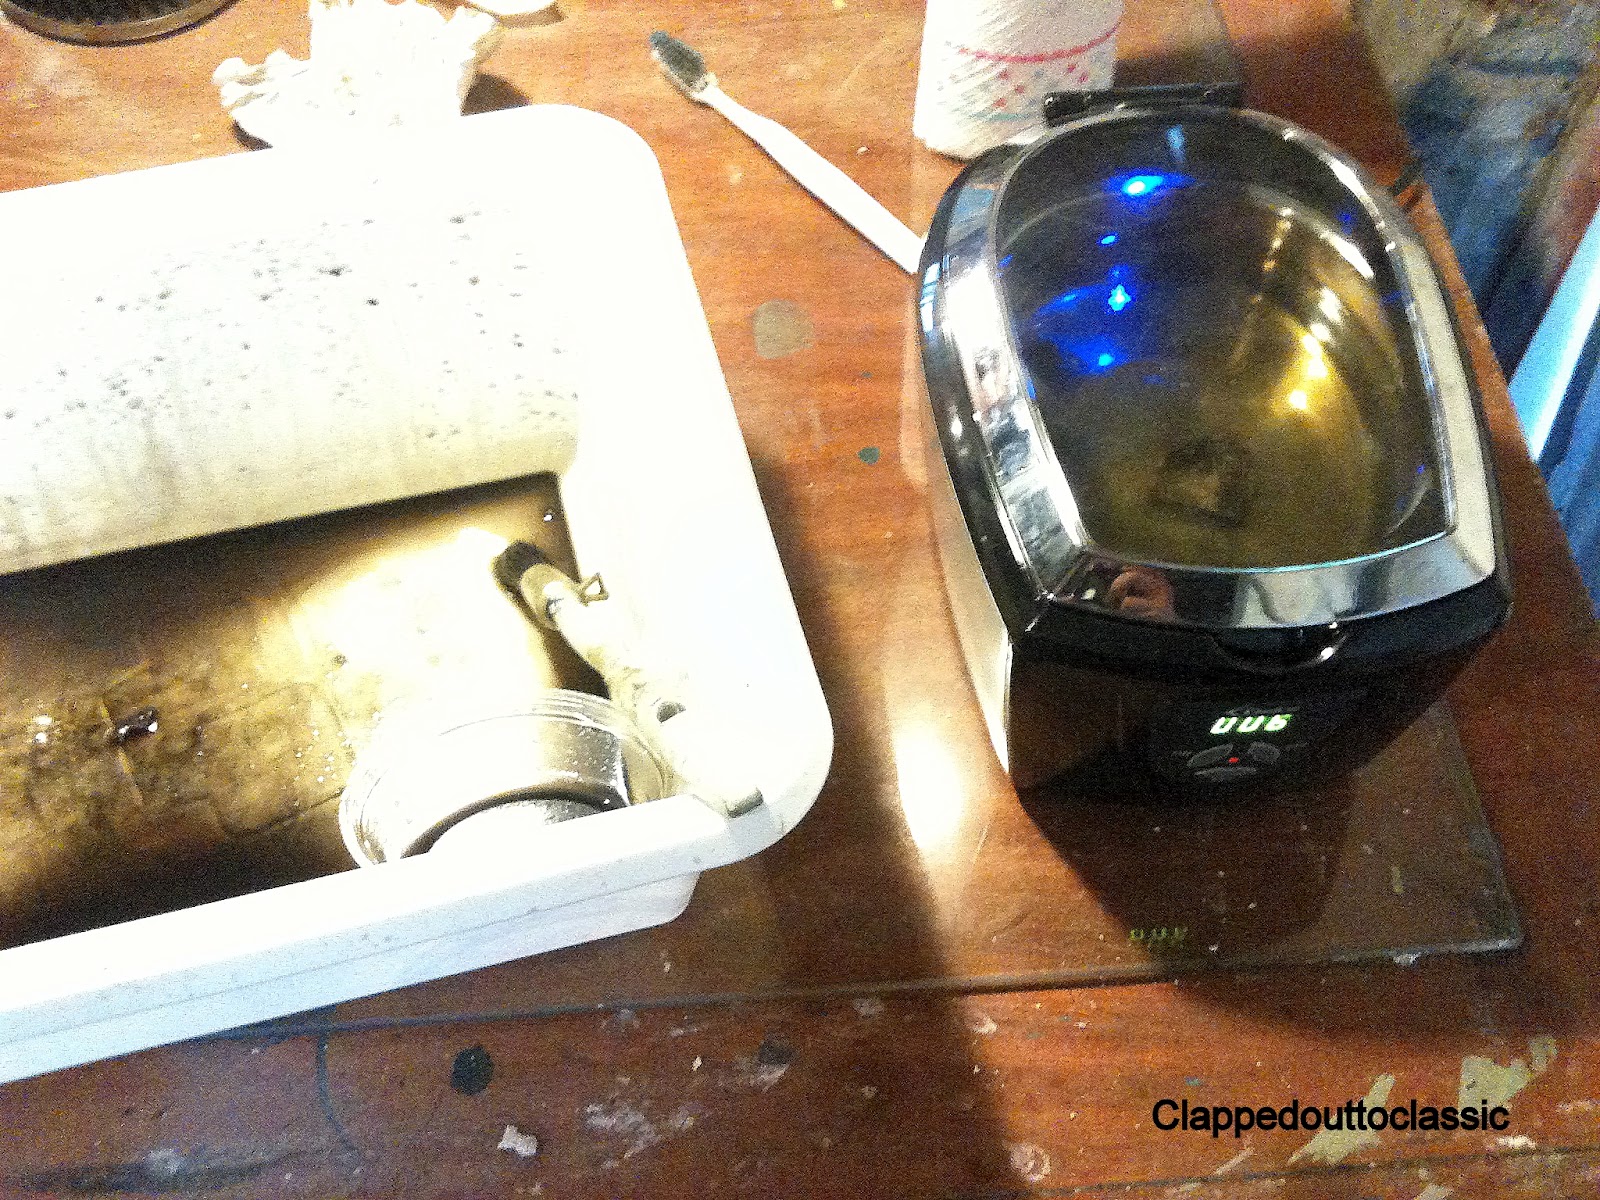
Whilst driving it around I did notice that the engine was a bit rough running. Starting was problematic with a few long turns of the starter to get it going as well as it being almost impossible to start when hot! Followed by dieseling (engine run on) when the ignition was switched off. After joining the ford Capri laser forum (http://www.fordcaprilaser.co.uk/ - a must if you own a Capri!) I was told to give the car a thorough service, time it and clean and set the carb up properly. I ripped apart the carb, being careful not to drop and screws down the throat! I cleaned it up with kerosene and mineral spirits and it all came up beautiful. I am lucky enough to own a sonic cleaner, which on little intricate parts such as that in the carb was perfect, see the following pictures for the before and after!

 Horrible right? The two plates on the right are the choke flaps, which were sticky and black, a tarry like substance which was a mix of burnt on petrol and oil. When the car diesels it sends up a haze of petrol vapour into the carburettor and sticking to all metal surfaces. Nice. The rest of the carburettor that was too big to fit in the cleaner was given a good scrub. When I pull the engine I will renew all the gaskets and probably the thermostat on the automatic choke, which is a little sticky.  

Carb in bits! New gasket needed!
Sonic Cleaner


The pictures below show the carb after it had all been cleaned! 
New toys!
Cleaned carb! Nothing stuck any more!


This next picture may just seem like a receipt, but notice how much it all cost! The oil in the Capri as well as the filter had been changed about a week before I purchased the car, and to look at the oil and the filter, they look both new, so im willing to accept it! It will do until I sort the engine anyway! 
My little shopping spree should have cost about 45 quid, but came to £16.71 thanks to a bloke (who is my hero and shall remain unnamed!) putting it all on his halford discount card. Top lad!

This is what your garage should look like after a service! Notice the timing light above the sockets! I love new toys!

The spark plugs! Look at them! Crusty horrible things that the ceramic had turned to dust on! Small wonder the car was running so bad! One of them was even cracked and came apart when removed! They are so old they are using the old Champion ID numbers! They are easily 10-12 years old! They came out....eventually with a pry bar...and new ones went in! This helped the running enormously! 
 After the service I never had a hitch with the Capri, it started up fine, ran great and the dieseiling had minimised. The fuel economy per tank increased about 100 miles per tank, and it sounded and pulled great!

James = very happy chappy. 

The next picture shows the start of the restoration, which is going to be done in my sisters garage. She has been a great sport actually, along with her boyfriend Simon, and here is a very shameless plug for her blog - http://www.laurenlovesblog.co.uk/

Its all about fashion and junk, which I suppose doesn't really apply to many of the people on this blog, but if you drive a Capri and like wearing make-up then its a match made in heaven. 

Having said that, the only problem with my sister's garage is that its in an alleyway. Which is too narrow to allow the Capri's 3 mile long body into the garage. So we had to edge the nose in and then push the back round using a jack! Fun times!

The car was enough in the garage to be driven in....but the garage doors were blocking the car doors! Simon had to jump in through the window....
 Here's my next problem.....RUST. Owning a Capri I am told is a game of "which bit to replace first" and every car is the same! If you can find a solid one you are only prolonging the game! This picture shows the bumper bracket, which I am going to have to cut off as the nut and bolt have become one piece! 
 The car with the front off! Strapped up the bonnet to the roof for a bit of extra security when sanding and working under the bonnet, the long job of grinding off rust starts!
 When I took the radiator cowl off, I found these beauties! AIR HORNS!!

They were disconnected, but working! I used them a few times by jumping them across the battery terminals. They sounded EPIC. I have taken them off however, and now are a garage toy!
These are brilliant! If you are taking off rust, this is brilliant! They wear down quite quickly, and cost about 8 quid, but they take everything off, rust, primer, filler, topcoat, the lot! And they also leave the metal underneath  perfectly shiny and nice!


Body rot...just in front of the headlight unit


 Inner sill rot...should be able to cut and replace
 This one is in the headlight unit itself, water collects at the back and has no way of escaping!
Finally the car as it stands currently, rust taken off the valence, and then crust put on top to stop it in its tracks! I will update later on when all the rust comes off and we start some welding!