-The engine has been removed
-Bonnet and door removal
-Interior trim removal
-Cutting and replacing panels, a crash course
-Wing restoration/ condemning
And of course the wing removal iteself.
So here we go!
PART II OF HOW TO REMOVE A FORD CAPRI WING - AND THE PASSENGER DOOR!
(continuing from the previous post)
Step 11,
By now you wife and kids should have left you, possibly taking the car with them as equity. If this has happened im afraid the road ahead for you is over. Try www.match.com, get a new family, buy a new Capri, realise the wings on that one too are shot, and repeat step 1.
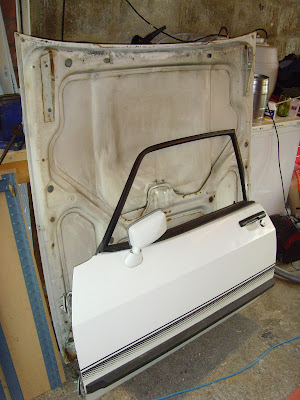
Step 12, As the front of the wing is now disconnected, you only have the back to do, but in order to do this, I'm afraid the door is going to have to come off. Its a pretty easy job, more so on the passengers side, the drivers side is a little more difficult and will be explained in a separate blog about dash removal.
This picture should fill you full of confidence! I can do it! So can you!
Sit in the car with the door as wide open as it will go, unwind the window fully (this helps with lifting the door later) and grab a friend to lend you a hand.
I will tell you this now THE DOOR IS HEAVY. Not horribly so, but heavier than you think if you have never picked on up before!
Step 13,
Whilst sat in the car locate the mounting bolts and pins. This picture shows the drivers side, because I forgot to take any pictures until after I removed the door. DOH!
 There are no obvious ways of doing this, as there and no screws, the whole thing is a plastic push fit design, however if you lift up the carpet and unscrew the front of the kick plate/ strip, the removal of this is much easier! And yes, my dash is held up with some wood. This was not my doing! :S
As you can see the plastic poppers are located near the door seal, so remove a little of the door seal and the plate pops off and slides out.
Step 14,
Remove the electrical connections and the waterproof boot. On mine the only connection was the speaker wire, so a pair of wire snips made short work of it!
Once that plate is removed you should see this.
Sorry about the picture size but it helps to understand it! The bolts can be accessed then, three at the top and three at the bottom. The middle pin can be removed with the cir-clip (have I spelt that right?) at the bottom and then just punching it out with a screwdriver.
Make sure someone is holding the door as you undo them!
Easy ay? A quick clean up is also a good idea to keep rust at bay, catching it early makes it dead easy, and will save you hours of problems later down the line, its also a good idea to have a quick look under the carpets. My floor is pretty solid (thank god!) but the plugs are not so good, im going to replace them pretty quick. I don't like wet feet!
Step 15,
As can be seen here:
Before you let that wing come off, remove the indicators and the ariel!
Continue to pull/ drill the wing off until the whole thing becomes a bit wobbly! You should be able to start seeing more and more light through the panel gaps!
Step 18,
Head under the car and take the final few spots off, get a friend to grab the wing as slicing you in half will seriously hamper your day.
Don't be afraid to use that old chisel! Pull apart the sandwiches of metal and it becomes much easier to do this as the wing becomes disconnected and less stable!
The body has been filled with seam sealer and other bits of rubbish from the ford factory, and bodge DIY repairs, so if something is stuck, see if a screwdriver will go through it! A hard pull got these two apart!
Step 20,
Job done!
Go pat yourself on the back and plaster your wounds. We are taking out the engine next!


